June 30, 2011

On the Table: Squash and Parmesan Pasta

I could eat squash every day for the entire summer!  I took a picture of the rest of the baby squash yesterday:


Look at the tiny one!

Three of these beauties ended up as dinner last night, as the stars of a pasta dish (along with a little white onion). 

The pasta "sauce" (it was more of a topping) really highlighted the fantastic squash flavor.  Minimal cooking and just a few complimentary flavors allowed the squash to shine.  Plus, the dish was really easy to make - and the sauce was finished in the time it took to make the pasta!

To prepare:

Put a large pot of well-salted water on to boil.

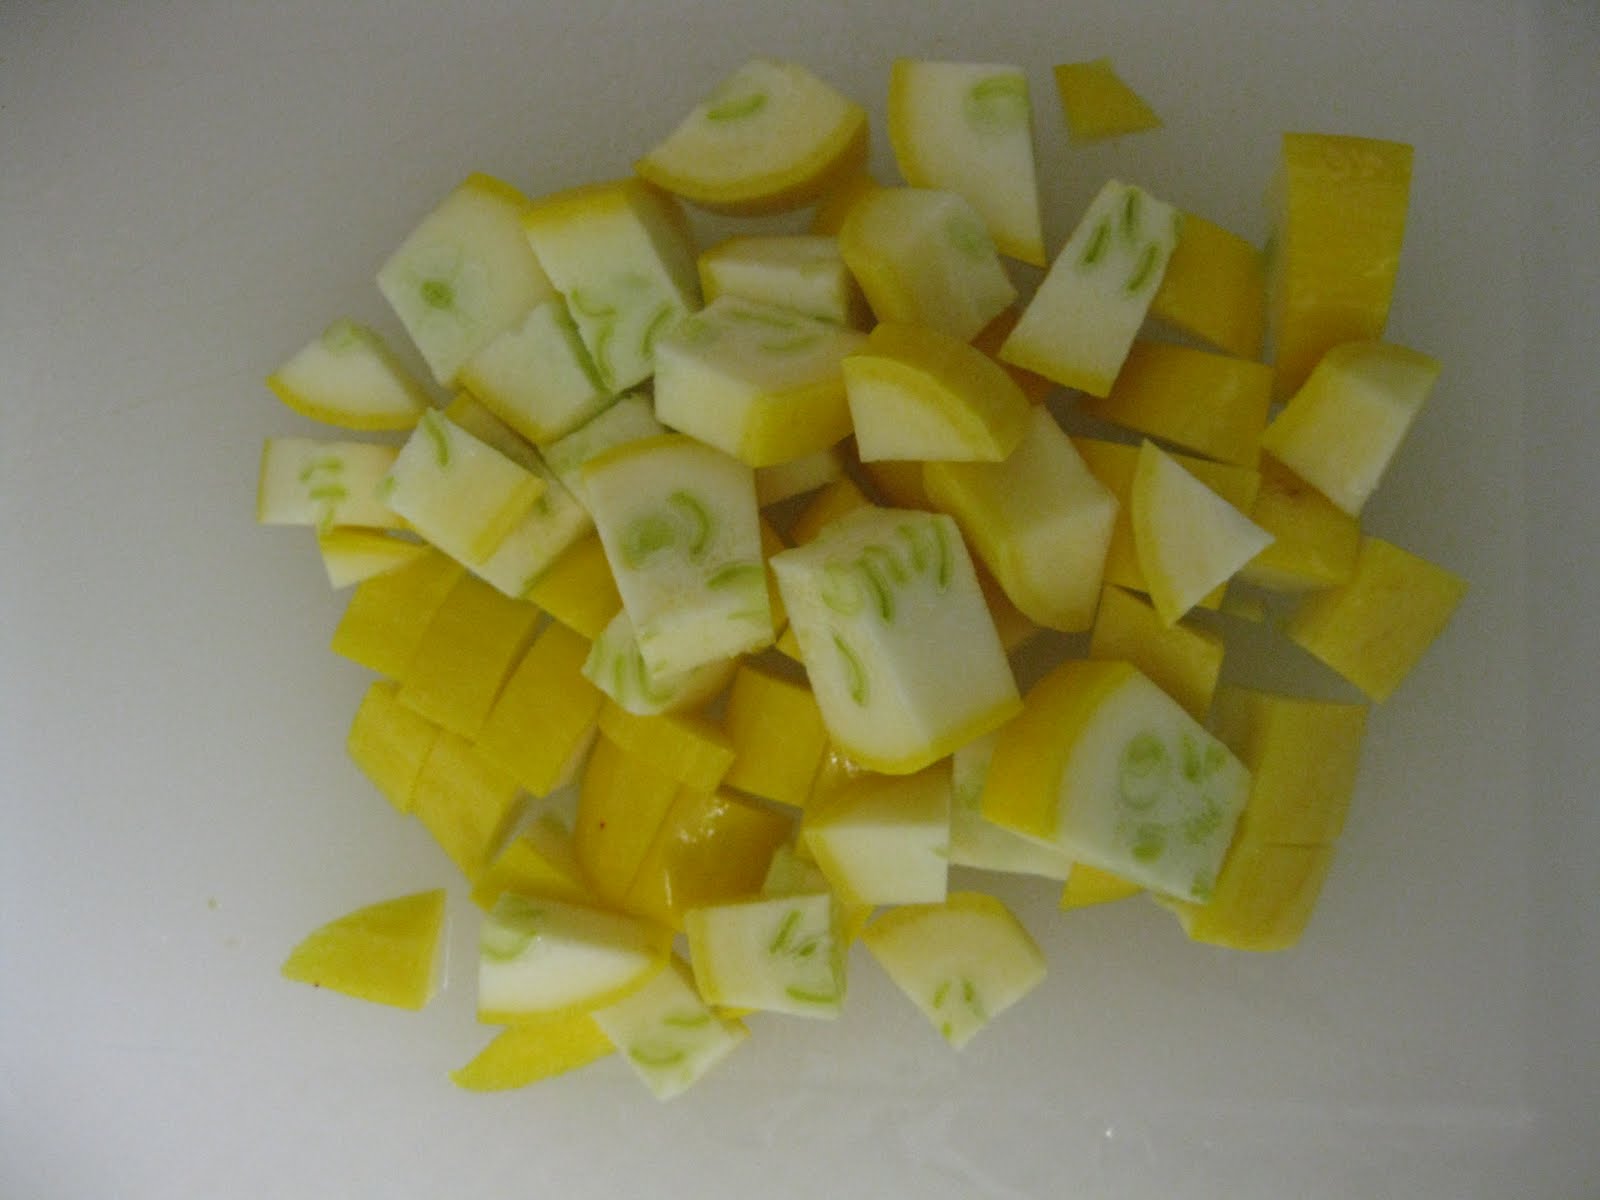
Finely chop the onion and cut the three small yellow squash (or 1-2 larger squash) into quarter inch pieces.


Put a large skillet over medium heat.  Thinly coat the bottom of the pan with canola oil.  When the oil gets hot, add in the onions.  


Cook, stirring often, until the onions begin to get translucent.  Add in the squash.  Cook for a few more minutes, just until the squash begins to cook. 


When the water comes to a rolling boil, add in half a pound of pasta (I used penne).

Add 1-2 teaspoons of worcestershire sauce and about 1/4 of a cup of chicken stock to the squash and onions, along with a dash of salt (don't go too heavy on the salt yet - you will be adding parmesan cheese later, which is pretty salty).  Cover the pan and turn the heat down a bit.  Cook for about 10 minutes, while the pasta is cooking. 

When the pasta is barely cooked, add it into the skillet, along with a splash of the pasta water.  Add in a small handful of grated parmesan cheese.


Stir well to bring all the ingredients together.  Taste and adjust seasoning.

Serve topped with more parmesan cheese.


Enjoy!

June 29, 2011

On the Table: Fresh Cherries and Squash (Not Together)

This is the time of year when I am super excited to eat beautiful fresh food raw or as minimally cooked as possible.  These beauties were at the farmers' market yesterday!


Yum, yum, yum, there is nothing better than fresh cherries!

Well, this beautiful yellow squash provides some strong competition...


I actually got a bunch of them, but I only took the picture of this one.  They are pretty small - they're baby squash!  Plus, they were just picked yesterday morning.  I just had to try one, so I roasted this guy briefly and it was just fantastic.  It is so easy to prepare, there is no excuse not to eat enough veggies!  To prepare:

Preheat the oven to 350 degrees.  Cut the squash into quarter inch pieces.


Spread the squash on a baking sheet, drizzle it with canola oil, a dash of salt, and a few twists of fresh ground black pepper, and rub the pieces so they are all coated.


Bake for about 30 minutes, or until the squash is tender.


Enjoy!

June 28, 2011

Mexican Coke: A Challenger for Kosher Coke?!

I very rarely drink soda, but once in a while I have to say there is nothing like a nice cold Coke (or root beer!).  I get especially excited around Passover, when Kosher Coke makes an appearance - it's made with real sugar, rather than high fructose corn syrup!  I really, truly believe there is a difference in taste, and I have been known to stock up on a couple bottles of the good stuff during Passover.

Last weekend, there was a music festival in Del Ray, and a few of the neighborhood restaurants were there selling food.  It was just the perfect venue for a cold drink, and I was extremely excited to see that Taqueria Poblano was selling MEXICAN Coke!  I had never tried it, so of course I had to get one, and it is definitely in the same category as Kosher Coke (I might even say it was better...and it's available year-round, if you can find it). 


Check out the GLASS BOTTLE!  Just based on the packaging, it was awesome.

Like Kosher Coke, Mexican Coke is made with real sugar.  (Can you see it?!  It's on the bumped-out part of the label.)


It didn't have the weird aftertaste that regular Coke has (it's not as pronounced as in the diet version, but I definitely get a weird lingering taste when I drink the regular kind).  Oh, and did I mention the glass bottle?? 

I assume that Taqueria Poblano must sell Mexican Coke all the time, so I know where I will be heading next time I get a hankering for a soda!

June 27, 2011

On the Table: Strawberry/Blueberry/Mint Sauce

Last Sunday, I made some highly unattractive blueberry pancakes (they tasted good, but I had some issues with sticking pancakes and bursting blueberries).  Yesterday I decided to make pancakes again (I guess Sunday is turning into pancake day!), but I figured I would put the fruit on top rather than into the pancakes.  I made a strawberry/blueberry/mint sauce that was delicious, and was ready in the time it took to make the pancakes!  To prepare:

Wash 1/3 of a pint of blueberries and a few large strawberries.  Cut up the strawberries (into about 1/8ths).  Wash a small handful of mint leaves and thinly slice them. 


Put everything into a small saucepot.


Cook, stirring occassionally, over low heat while you make pancakes (15-30 minutes).


And that's it!  Easy, right?


The sauce was delicious on its own - it would also be fantastic in oatmeal or over ice cream!  If you are making the sauce with berries that are not perfectly ripe, you may need to add in a little bit of sugar while the fruit it cooking (or just get your fill at this time of year, when the fruit is perfect!).

Enjoy!

June 24, 2011

Off the Shelf: Ingredient Love

I just finished reading The Artful Eater by Edward Behr, and I was really impressed.  Some of the material in the book my be outdated (it was published almost twenty years ago), but I am sure I will be using it as reference for a long time.


The book is a compilation of essays about individual ingredients, most of which appeared in a quarterly newsletter Behr had previously published.  So many of the books I read are about cooking or chefs, that it is refreshing to have a good read that focuses on the quality and variety of individual ingredients.

The selection of topics provides an interesting cross-section of ingredients.  Some are universal (salt), while some are very localized (aged country ham).  The essays do not follow a standardized model, but for each ingredient, Behr provides information about its history, its uses, and determinants of its quality.  He seems particularly interested in ingredients that represent a range of species or varieties (pepper, salmon, vanilla, coffee), and he does a great job of explaining the range of varieties and their respective strengths and uses.

Some ingredients clearly hold a special place in Behr's heart - his essay on cream is more of an ode to un-pasteurized, un-homogenized, high-fat dairy products.  For other ingredients, he leaves little room for sentimentality.  When discussing tomatoes, he allows that people's recollections of tomatoes past may be tinged with a bit of fantasy - and old-time favorites would not necessarily be preferred today.  (It is fascinating to learn that even twenty years ago, people were lamenting the state of the tomato.)  Furthermore, he claims that good farmed salmon tastes the same as wild.  This sense of realism really led me to enjoy the book - rather than waxing rhapsodic about obscure or impractical ingredients for their own sakes, Behr provides practical information that can truly be used for improving one's cooking (and eating!).

Given that the book was published in the early 90s (in the essay on coffee, Behr discusses an up-and-coming coffeeshop chain from Seattle that currently had 90(!) stores - and based on the discussion of roasting, I feel vindicated in my belief that their coffee tastes burnt.  But I digress), I would be interested to do some additional research into the current state of some products.  Particularly in the past few years and given the increasing interest in food, I suspect that some of the top-quality ingredients may be making a reappearance.

This book does include a few recipes, provided at the end of the book rather than along with each chapter, as well as sources for some of the ingredients discussed in the book (though I'm not sure whether they are still relevant, given the amount of time that has passed since the book was published).  Behr also provides a fantastic bibliography that provides sources for additional reading on individual topics as well as general food books and cookbooks.

June 23, 2011

On the Table: More Radish Apps - This Time with the Greens!

My love affair with these radish and scallion butter apps continues.  Really - crunchy toast, soft sweet oniony herby butter, biting peppery radishes...what could be better??  Well, I started making some for a little snack the other day, and the nice green radish tops caught my eye.


I wanted to try to use them somehow, so I figured for a first little experiment, I would try sauteeing them.  I used the scallion butter, which lent the radish tops a fantastic flavor.  The sauteed tops were vaguely reminiscent of broccoli rabe (which I love).  They would be a great as a side dish, or they could even be incorporated into pasta - they could pretty much be used anywhere you would use other sauteed greens, like spinach or kale.  However, I decided to eat them...on toast!

To prepare:

Put a nice slice of soft French bread into the toaster or toaster oven.  The topping will be done by the time the toast is!

Cut the tops off two radishes.


Cut each top into about four pieces (you want bite-sized pieces).

Put a small saute pan over medium heat.  When the pan gets hot, add in a hefty piece of scallion butter (about half a tablespoon).


When the butter melts, add in the cut greens.


Saute for just a few seconds, until the greens wilt.


Pour the greens (and the melted butter!) onto your toast.


You could also put a couple slices of radish on top.  The peppery radish provides a nice counterpoint to the buttery, savory greens.


Enjoy!

June 22, 2011

On the Table: Murgh Masala

I adore Indian food, but somehow in my mind it is intimidating to attempt at home.  Every time I do it though, I am thrilled with the results!  Last night I decided to give it a try, and once again I was so happy I did.  I have a wonderful cookbook called The Food of India that I use as my go-to guide. 


Usually when I cook, I pretty much make things up as I go along.  However, for Indian food, the beauty is really in the combinations of flavors and spices, and since I am not intuitively familiar with how the different flavors combine, I really rely on recipes in this case.  The Food of India also provides lots of background information, and is really good about providing substitutions for equipment and ingredients that might not be available in an American kitchen. 

I made Murgh Masala, though I made some changes to the recipe as I went based on the ingredients I had available.  Apparently I was a little spacey last night - I completely forgot to take pictures as I went!  I must have been really engrossed in the recipe :) 

To prepare:

In a large mixing bowl, combine half a teaspoon of ground cumin; half a teaspoon of coriander seeds, crushed with a morter and pestle


(or you could use ground coriander); half a teaspoon of turmeric; and half a teaspoon of garam masala.  Cut two boneless, skinless chicken breasts into bite-sized pieces and add them into the bowl.  Stir well, until all the chicken is coated in the spices.

Finely chop one white onion, two cloves of garlic, and six cherry tomatoes.  In a small bowl, combine half a teaspoon of ground ginger, half the chopped onion, and the chopped garlic and tomatoes.  Stir well to combine.

Put a large skillet over medium heat and coat the bottom of the pan with canola oil.  When the oil gets hot, add in the other half of the chopped onion; half a teaspoon of clove powder, and half a teaspoon of ground cinnamon.  Cook until the onions start to brown.  Add in the onion/garlic/tomato mixture and stir well to combine.  Cook for a few more minutes.  Add in a healthy dash of salt and stir well to combine. 

Add the chicken mixture to the pan, along with six ounces of Greek yogurt and about 1/3 of a cup of chicken stock.  Stir well.  When the liquid comes up to a simmer, cover the pan and allow to cook for 45-50 minutes.  Remove the lid and allow to cook for about 10 more minutes, or until the sauce reaches the desired consistency.  Taste and adjust seasoning.

Serve over rice.  (I did remember to get a picture of the finished product!)


Enjoy!

June 20, 2011

On the Table: Blueberry Ricotta Chicken

Blueberries are everywhere these days, and I have been eating them CONSTANTLY!  They were delish on toast with cream cheese...


...and fantastic on ice cream...and wonderful just plain...

ANYWAY, I decided today to try blueberries in a savory application, and the experiment turned out wonderfully.  I roasted chicken breasts, lightly seasoned, and made a sauce with blueberries and ricotta.  The sauce was delicious on its own (I ate the leftovers on a piece of bread!), and with the chicken it was really fun and unexpected and delicious!  To prepare:

Preheat oven to 350 degrees.  Lightly season chicken breasts with salt, freshly ground black pepper, cayenne pepper, and curry powder.  Place them in an oven-proof dish (I just used a pie plate) and pour in chicken stock just to thinly coat the bottom of the pan (you could also just use water, if you don't have chicken stock on hand). 


Loosely cover the pan with a piece of foil and put it in the preheated oven (liquid + cover = nice juicy chicken!).  Cook for 30 minutes, then remove the foil and allow to cook for approximately 10 more minutes, or until the chicken is cooked through.

While the chicken is cooking, prepare the (really easy) sauce.  Wash half a pint of blueberries and put them in a small saucepan.


Add in just a splash of liquid (I used chicken stock, but fruit juice would probably be fantastic too) and cook over low heat, stirring occassionally, for about 15 minutes.  The blueberries will start to break open and release their juices.


Allow the sauce to cool slightly.  (You could puree the blueberries at this point, if you wanted a smoother sauce, but I liked the more rustic version.)  Add a (large) dollop of ricotta to the sauce...


...and fold it into the blueberries.


Taste and add salt if needed. 

When the chicken is done, serve it topped with the sauce.


Enjoy!

June 19, 2011

On the Table: Mighty Green Stir Fry

I had a whole bunch of vegetables in the refrigerator last night, so I decided to make a veggie-filled stir fry.  The vegetables were predominately...green...hence the name!  Stir fries are really easy to prepare - the main consideration is making sure that everything is cut to the proper size so that it will cook evenly.  I don't have a wok so I just used a big skillet, and it worked great. 

The only possibly-unfamiliar ingredient in here is fish sauce, which is made from fermented anchovies.  I got it at the Thai grocery store, where a man who was originally from Thailand helped direct me to the best brand.  I learned that the darker the color, the stronger flavor - so I went with a light-ish one:


To prepare:

Prepare a cup of rice (I used brown rice), over which the stir fry will be served.  While the rice is cooking, prepare the stir fry.

Clean and cut up the following: one green bell pepper; half a pound of green beans; a quarter of a pound of mushrooms; and two garlic scapes.  Cut everything to eating-and cooking-appropriate sizes.  For example, I cut the ends off the green beans and then cut them into approximately one inch pieces, but I cut the scapes much smaller because you probably don't want a big mouthful of garlic scape. 


Put a large skillet over medium-high heat and coat the bottom of the pan with canola oil.  When the oil gets hot, add in the green beans.  I did not blanche the green beans before stir frying them, so they needed a little more time to cook than the other vegetables. 

While the green beans are cooking, mix together the following in a small bowl:  one tablespoon of sugar; two tablespoons of soy sauce; four tablespoons of fish sauce; and two teaspoons of crushed red pepper (or less pepper, if you don't want it too spicy).  Thinly slice four scallions.

When the green beans start to get tender, add in the mushrooms.


Cook for a few minutes.  When the mushrooms start to brown, add in the green bell peppers.


Cook for a minute, then add in the scapes and the sauce.  Cook for a minutes or two, then add in the scallions.


Stir well to combine, and cook until everything is heated through.


Serve over rice.


Enjoy!

June 17, 2011

On the Table: Scape Pesto

When you are working with a head of garlic, have you ever wondered what the rest of the garlic plant looks like?


Those are garlic scapes!  They are beautiful AND delicious (don't they look like they belong in Alice in Wonderland?).  They taste - surprisingly enough - like garlic, though they have a more mellow flavor than you would get if you just ate a clove of garlic.  I got these guys at the farmers' market, and I think a farmers' market or maybe a gourmet grocery store are your best bet for finding them - I did not see them at the regular grocery store.

The sign at the market said they are great for pesto, so that is what I decided to make.  I used walnuts instead of pine nuts because 1) I thought the more mild walnut flavor would be a good accompaniment and 2) I had some in the freezer.  Pesto is a super easy and delicious way to make a quick summer meal, and this version was no different.  I made it in my food processor, but you could also use a blender.  To prepare:

Wash the scapes and cut them into manageable pieces (I used about five scapes, and cut them into fourths).

With the food processor running, add in a handful of walnuts (about half to 3/4 of a cup).  Add in the scapes.  Stream in extra virgin olive oil until the pesto has reached the consistency you want.  Taste and adjust ingredient amounts as needed.  Scrape the pesto into a bowl, and fold in grated parmesan cheese (about an ounce).  Taste and add more cheese if needed, and add salt if needed (parmesan cheese is pretty salty, so try to get comfortable with the amount of cheese first).

Serve over pasta, with additional parmesan cheese on the side.


I love the color!  This dish is VERY garlicky, so be prepared for that.  It would also be delicious to use half basil and half scapes, which would mellow out the flavor.

Apparently I am not as ingenious as I thought because after I made this dish, I did a Google search on scapes to try to learn more about them and this is the first result I got!  Haha, great minds think alike I guess.  I take this as a sign that my flavor-combining skills are improving!

Enjoy!

June 16, 2011

On the Table: Radish and Scallion Butter Apps

I put the scallion butter I made yesterday to good use, along with some radishes and nice soft French bread.  I got the idea from Barefoot Contessa (you can see Ina Garten's version here).  Well, I picked up some radishes at the farmers' market this week,


and the combination did, in fact, turn out to be fabulous!  Radishes have a fairly peppery taste, and the scallions in the butter help mellow out the spice.  I used soft French bread


rather than a baguette, but I can imagine that baguette slices would be fantastic - you could make them into one or two bite appetizers.

The radishes I got were pretty long, so I cut them lengthwise (I didn't want to end up with millions of little radish dots - although radish polka dot bread would be pretty cute!).  I cut them really thin.  A mandoline would probably be perfect for this task, but I just used a knife (be careful!).


I cut the bread relatively thin and toasted it.  As soon as it came out of the oven, I topped it with a slice of scallion butter so the butter softened, then I topped the butter with a few slices of radish.  I tried a later piece with some freshly ground black pepper on top, and it was delicious (but VERY peppery!). 


As Ina Garten would say "How easy is that?" 

Enjoy!